Showing posts with label gluten free. Show all posts

Friday, June 4, 2010

BBQ Buffalo Pasta


About a year ago, I heard about combining spaghetti and bbq’d meat. My initial reaction was, well, picture me wrinkling my nose and shrugging one shoulder as if to say "eh". Even so, I’ve never stopped thinking about it. Yesterday, as I stood at my kitchen counter praying for divine menu guidance as to what to do with the ground buffalo before me, the thought of making a quick bbq came to mind. The only problem was that a) I didn’t have any buns, and b) I only had a mere 1.25 lbs of meat. That’s when I thought of at long last giving the bbq pasta plan a green light.
Oh, why did I wait so long? This was ridiculously easy to prepare, was on the table in just over 30 minutes, and was really very good. Even my picky eaters ate it, including my son who won’t eat sauce on his pasta ... ever. I served mine over gluten free rotini (spiral) pasta, but use whatever floats your boat. This meaty, thick, smokey sauce will hold it’s own quite nicely with a hearty pasta like rigatoni as well as a delicate one like angel hair. (Mmm ... angel hair!)

I used ground buffalo, but use whatever ground meat you’ve got (preferably grass fed). There is minimal shrinkage with buffalo (and I mean zip, zilcho shrinkage), so plan accordingly if you use ground beef. This fed five people.

1.25 lbs ground buffalo
Salt, Pepper, Seasoned salt
1 teaspoon dried minced onion (can substitute fresh minced onions)
1 teaspoon worchestershire sauce
2 Tablespoons brown sugar
Scant ¼ cup smoked paprika (the smokey flavor is essential here)
Generous ½ cup ketchup
Heaping tablespoon prepared yellow mustard
3 cups of your favorite spaghetti sauce (homemade if you’ve got it)
1 lb spiral pasta (I used gluten free. Use whatever you like best!)
Shredded cheddar cheese

Cook the pasta according to package directions. Meanwhile, season the ground buffalo with salt, pepper, seasoned salt, and dried onion. Brown in a nonstick dutch oven, breaking it up into small bits with a spoon as it cooks. There was no fat in the bottom to drain at all. If you use beef, drain the meat after browning and return to the pan. Sprinkle with the brown sugar and stir around to start carmelizing the meat, maybe 1-2 minutes at the most. Stir in the ketchup, mustard, and worchestershire sauce. Stir in the smoked paprika. Now add the spaghetti sauce. Bring to a boil, reduce heat, and let simmer until it thickens up a bit ... about 10 minutes. Note that this is a really thick sauce. Taste and adjust seasoning if necessary.

Add the drained pasta to the meat mixture and stir to combine. Serve. Garnish each serving with a small handful of shredded cheddar cheese. Enjoy!

This was really very, very good. Quick and easy, too. The balance of meat to pasta was pleasing, and the smokey tanginess of the sauce held it’s own over the pasta without being overpowering. The cheese added a creamy component that I enjoyed. Ya know, this is a case where simple is best. While I wouldn’t balk at adding, let’s say, green pepper, it’s really not missed. You could, however, ramp up the spicy heat index according to your own tastes.

I imagine this would be incredible, too, if made with grilled BBQ pork that simmered all day. So ... do you think you’d give bbq pasta a try? You’ll be glad you did.

Thursday, May 27, 2010

Birthday Pancakes! - aka Bob's Red Mill Pancake Mix (gluten free)

Today is an extra special day at It's All Gouda. My youngest, my baby, my littlest gal, my wee sous chef turns 11 years old. What makes this birthday uber special is this:  Birthday girl turns 11 at 11:11 am. Get it?  11 - 11:11!!!  I'm such a number geek, but hey, you've gotta admit that's a pretty cool anomaly!

In honor of her special triple-double-double digit day, we made gluten free pancakes this morning. Now, you gluten eaters stay with me, since this is basically a review of a pancake mix.
Oregon's beloved Bob's Red Mill cranks out many gluten free flours and products, including this one:  Gluten Free Pancake Mix. You can find it at most grocery stores in Oregon or mail order.
Here's the ingredients if you want to check it out. Nothing weird. Those flours and starches are pretty much par for the gluten-free course.

Gluten free products have taken off lately, almost in fad like fashion, and that's fine with me since we follow a gluten free diet because of my daughter's wheat intolerance. Yep, I said intolerance. For most people following a gluten free diet, the condition they deal with is an intolerance NOT an allergy. Stomach aches, indigestion, bloating, headaches, skin issues, feeling blah ... it's not fun. We can chat about that another time. Today's recipe IS  fun, and really quite delicious, too! 

While I prefer to make stuff from scratch, this mix is uber convenient especially since I've not dived into making my own gluten free mixes (will be doing that soon). Since this is a pre-made mix, only a few additional ingredients are required:  an egg, milk (we used part milk/part buttermilk), and oil.  Wisk it all together, and you're good to go.
As you can see here, the batter is kind of freckly. (Is that the correct spelling: freckle + ly?) These cook in a similar fashion to "regular" pancakes except the bubbles you look for to know when to flip are bigger. See that one looming in the upper left corner?  Time to flip!
I'm not a leavening expert, so I don't know if it's due to the buttermilk addition or if this is how it always is, but these puppies really puff up! They aren't dense either ... nice and fully light, and they reheat beautifully. We've made these several times, and have gotten a bit creative along the way.
You can add chocolate chips! Just sprinkle a few (dozen) on right before flipping.
See how light and puffy these are? Um, how about a little pancake to go with the whipped cream and strawberries there, babe?
My birthday girl is a cherry fanatic ... please excuse the excess of whipped cream.
No matter how you serve them, they are finger lickin good! Don't you love my b-day girls new Buddy Holly style glasses? Just picked those up yesterday. She looks so much older now. I, of course, haven't aged a bit (eh, cough cough).

This mix gets two birthday thumbs up in our household. I can totally see me bringing this camping or travelling, as it's so easy to make. And, for those of you who have gluten-free eating loved ones, this would make a great gift pack especially for someone new to the whole gluten-free thing. It made a wonderful birthday breakfast here. Along with a pint of whipped cream. And an orchard of berries. Just kidding. Well, not really, but you know what I mean.

What do you like to eat for breakfast on your birthday?

Monday, May 17, 2010

TBS: Tuna and Bean Salad!

Now that warmer weather is at long last blasting it's way through the Pacific Northwest cloud cover, it's time to initiate the summer salad routine. Here's one that I've loved for years. It's kind of peasant fare, but tends to get rave reviews as if it were made of more regal stuff.  I bet 9 out of 10 of you have the ingredients in your pantry and fridge. 

Bean and Tuna Salad 

1 6oz can tuna packed in olive oil
1 15 oz can small white beans, drained and rinsed
2 T green pepper, chopped
4 cherry tomatoes, halved
1 T red onion, small diced
2 T chopped parsley

Dressing:Whisk together:
1 small garlic clove, minced
Olive oil - 2 parts
Vinegar - 1 part
Salt
Pepper
1/2 teaspoon - dijon style mustard
favorite herbs - such as basil, oregano

In a large mixing bowl, combine tuna, beans, pepper,tomatoes, and onion. Toss with a small amount of dressing, adding more to suit your taste. Serve immediately. Keeps very well, too; the beans tend to really absorb the longer it sits.

This salad is easily a meal in and of itself. The beans have a delicate flavor that pairs wonderfully with the tuna. I've also had this with grilled tuna, and that's over-the-moon good. The peppers add a nice crunch, and the tomatoes provide sweetness. Take care with the onion ... you just want it for a nice flavor addition. The dressing, which is basically a viniagrette, is tangy and garlicy. You could punch this up with some diced jalepeno peppers if you like heat, or some olives or capers if you like those flavors. I like it all! :-)

There you have it. In about 5 minutes, you can create a yummilicous salad that's perfect for the warmer days on the horizon. This holds up very well for potlucks and picnics, and it is gluten free, too. What's your favorite tuna salad?

Monday, May 10, 2010

MOM Chicken: Mandarin Orange Marmalade Chicken (gluten free, too)

Happy Mother's Day to all you Mom's out there. This dish is named for you. MOM Chicken! Mandarin Orange Marmalade Chicken, that is!

Sometimes, the best recipes are the simplest ones.  Especially when you discover them without too much forethought. Take today's recipe. With just a couple pantry staple ingredients, regular ol' chicken becomes something really special. Even better the entire meal was on the table in less than 30 minutes.  Works for moi!

Basically, and I mean that word literally, all this dish entails is sauteing chicken strips, adding a little marmalade and butter, and voilla .. you have chicken ala mandarin. Toss on a few crispy onion frizzles and you find yourself emitting little moans of culinary pleasure.

This was really good. I used this delightfully sweet mandarin orange marmalade. Please don't harp on me that it's imported.  I so very rarely treat myself to something, and this is what I choose to spend my dollars on. I enjoyed every sinful bite. Yes, I try to purchase local food to lessen my global footprint. No, I don't purchase everything local. I most definitely recycled the glass jar it came in, if that makes you feel better.  Anyway, this would work with any type of marmalade and be equally delicious.I've not shown amounts because I eyeballed everything. I threw this together so quickly, that I didn't pay attention to measurements. Sorry 'bout that. No worries, though, it's really easy to do.

Ingredients:

White Onion, halved, sliced thin (you dont' want to use a sweet onion here)
1 tablespoon Olive oil

Chicken breasts cut into thin strips
Seasoned salt
Olive oil
Worcestershire sauce
Butter pat
Marmalade
Butter pat (again)

Heat oil in a fry pan.  Add the onions, and fry them until crispy. You are going for texture as well as flavor here. Keep warm. In a large saute pan, heat oil over med high heat.
Season the chicken strips with seasoned salt or your favorite seasoning.  Add to the pan, and saute until golden.  Add a butter pat to the pan and spinkle with couple shakes Worcestershire sauce.

Meanwhile, heat the marmalade in microwave until melted.  You don't need very much, I used about 1/4 cup for 5 servings.  Once heated, stir in a butter pat, and pour over chicken in pan. It will bubble up deliciously. Be sure to stir up all the browned bits that are in the pan. The end result is a glaze/sauce that is out of this world good.  Simple, yes. Good, absolutely! Sprinkle with the crispy onions, and serve immediately.
Wasn't that easy? So simple, and sooooo good. We paired this with rice, spinach, and a fruit salad. It was superb. S.U.P.E.R.B.  You could fancy this up with green onions, ginger, and a splash of soy sauce, but I kept it simple.
I like simple. I like easy.  Most of all, I like good food! Bonus: It's gluten free, too!

Speaking of good things, Happy Mother's Day to all you magnificent mom's out there. Also, happy  Teachers Appreciation Month to all you terrific teachers out there, both the traditional and homeschool varieties.  Mom's and Teachers ... two of the most positive, loving, influential forces on the planet. For all you do, big and small, seen and unseen, I thank you for your dedication. You are  loved and appreciated!

Thursday, April 29, 2010

Creamy Clam and Smoked Sausage Chowder (Gluten Free)

Springtime weather in the Pacific Northwest is kind of schizophrenic. One day, you’re reaching for sunglasses to shield your eyes from the brilliant sunshine, and the next day you’re donning your parka to brave the driving wind and rain. Yesterday, we had sun, rain, wind, hail, then more sun, rain, wind, and hail. Mother Nature is a mystery out here, that’s for sure.

On a gastronomic level, that mystery means that one day you could be craving salad and lemonade, and the next day steaming bowls of soup and hot cider. I’m a year round soup girl anyway, so with the bizarre weather of late, I’ve been enjoying lots of soup.

Chowders are such a great genre of soup. Hearty enough to stand alone as a meal, they are super choice to eat when you want something filling, but not heavy ... if you know what I mean.

Since we are gluten free here, I prepare chowder without flour. I actually find that chowders taste significantly better when not weighted down with flour. A little bit of cornstarch along with real cream provides clean flavors along with a gorgeous consistency.

Today’s recipe is the result of using up some pantry and fridge items I had, including some leftover grilled smoked sausage. The end result was so good. My littlest clam lover ate two huge bowls in a single sitting.

See how creamy it is? Take a look and let me know what you think:

Creamy Clam and Smoked Sausage Chowder (Gluten Free)

3 Tbsp olive oil
½ cup onion, chopped
3 large, all purpose potatoes, peeled and diced small (about 2 heaping cups)
Seasoned Salt
½ cup cooked smoked sausage, cubed (ham would be good, too)
3 slices cooked bacon, broken in big pieces
1 8oz bottle clam juice
2 cans chopped clams (not minced)
1 cup cream
½ cup whole or 2% milk
1 scant tbsp corn starch

In a large stock pot, heat olive oil over med high heat. Add onions and sausage. Cook gently until onions just start to soften. Next, add the potatoes. Season with seasoned salt.

Cook, stirring occasionally, until potatoes are just starting to turn golden, not quite 5 minutes. Add the bacon, and cook for another minute. Add the clam juice, cover, and simmer until the potatoes are tender, about 15 – 20 minutes. Stir in the clams (undrained) and cream. In a measuring cup, whisk the milk and corn starch together, then add to the pot. Continue simmering the chowder for another 5 minutes or until it has thickened up.

Enjoy. Make yummy noises. By the way, this tastes even better the next day.

Tuesday, April 27, 2010

Creamy, Crunchy, Chewy, Curried Chicken Salad (Gluten Free, too!)

Join me in the following chant: Creamy, crunchy, chewy, yeah! Creamy, crunchy, chewy, yeah! Those three alliteration-worthy descriptor words quite successfully boast the goodness of this wonderful curried chicken salad.  I adored this beautiful golden-hued salad and so did my youngest daughter.

We made it together, actually, and she did most of the work. (Doesn't everyone wish they had a red panda shirt like my little gal?) Now that she's homeschooled, we are spending more time together in the kitchen. (Not just cooking either ... today we made invisible ink to write coded messages like the Patriot's did in the American Revolution! Um, then we, um, proceeded to make secret coded messages for the entire family. hehe) Okay, back to the recipe.

For those of you who are wrinkling your brow wondering if you're ready to venture into the curry-flavors of the world, let me assure you that this is the recipe for you. It is not spicy at all, but does explode with terrific texture ... creamy, crunchy, and chewy, yeah! Plus, it calls for curry powder as opposed to assembling multiple spices that are par for the course when actually making a curry. Make sense?

Anywhoooo ... this couldn't be simpler, is delicious the moment it's made, and tastes outstanding the next day. It would feel right at home as part of a luncheon menu to serve to guests as well as everday lunch fare. Little curry girl and I ate ours right off the plate. I even licked the serving spoon and was tempted to lick my plate, as well.

Here's what you need:
1/4 cup sliced almonds (or chopped peanuts or cashews)
3 cups cooked chicken, cubed
Scant 1/2 cup mayo
1/2 cup plain yogurt (Greek style is AWESOME!)
1 tsp curry powder
1/2 cup red grapes, sliced in half
1/4 cup raisins (or diced dried apricots)
1 Tbsp snipped cilantro

In a saucepan over medium heat, carefully toast almonds. Remove from heat and let cool. In a large mixing bowl, whip yogurt, mayo, curry powder, and cilantro until creamy. Fold in chicken, almonds, and raisins. Carefully fold in grapes. Serve. Tastes even better the next day. Can be served as is, over lettuce greens, or as a sandwich filling. YUM! And obviously, this is gluten free all the way, baby!

In case anyone is wondering where I've been lately, here's a hint. First, Blogger has changed how to post things and I get so many error messages when I try to post that I'm seriously considering moving the blog. Second, now that I'm homeschooling two out of three kids, spare time goes to shuttling all three to track practices and meets. Here's proof: Check out my 14 year old son running at the meet this past weekend. It's stunning how much a kid can change in just a couple of months. Click on the photo to enlarge it. We call him the "man-child"!  :-) 

Tuesday, April 6, 2010

Almond Crusted Chicken Tenders - Another Gluten Free Goodie!

Recently, the culinary blogsphere has been boasting the exploits of cooking with almond meal instead of traditional flour. So, I thought “why not give it a try?” Years ago, I used to prepare this awesome Asian recipe for Walnut Coated Chicken Bites. It was an outstanding recipe, but was a bit labor intensive requiring marinating, dipping in egg, etc. This new recipe, though, comes together in a snap!

(Oh ... by the way, I’m now homeschooling my littlest chicken tender, too! I’m in heaven with 2 out of 3 of my brood here during the day. Homeschooling rocks!)

Back to our regularly programmed chicken story ...I already knew that the walnut recipe was fantastic, and so it was a natural leap of faith to experiment making chicken tenders using almond meal. I wanted to keep it really simple though, so I didn’t go through the steps of marinating and egging, et al.The results were really good! As you know, homemade chicken tenders far, far, far outshine anything you could buy pre-made. This almond meal coating approach keeps the recipe gluten free, and is super-d-duper simple to prepare. I made a TON of these using multiple pans because I wanted to have leftovers for lunch the next day. I turned the left overs into chicken parmesan, and let me tell ya folks, that was GOOD EATS!I didn’t measure out the ingredients, but it’s so easy that even a first time cook could do this with ease. I’m guess-timating pared down volumes for you here.

Ingredients:

- 1 cup almond meal (I used Bob’s Red Mill brand – it’s gluten free. You could finely grind your own blanched almonds if you wanted to. Your food processor may enjoy the workout! Your ears may not appreciate the noise level, though!)
- Your favorite seasonings: I used Lawry’s seasoned salt, garlic salt, and black pepper.
- Olive Oil – to coat the pan
- Chicken tenders – about a dozen

Preheat oven to 400 degrees. Line a rimmed baking sheet with foil and drizzle with olive oil. Brush oil around to evenly coat the baking surface. Combine the almond meal and the seasonings in a bag. Drop the tenders into the bag and shake vigorously to coat. Place on the baking sheet taking care not to crowd the pieces. Keep those molecules apart people! It’s better to use two pans than shove them close together on one pan. Place in the oven and bake for around 8 – 10 minutes. Flip the tenders over, and bake for another 8-10 minutes. Take out of the oven and let sit on the baking sheet for about 5 minutes. Carefully remove and serve.Um, does uh anybody else besides moi like to nibble on the crusty parts left on the foil? hehe Oh come on, don’t judge me!These were really tasty! The almond meal actually is very mild allowing the chicken flavor to easily dominate. I served these with a super yummy sour cream dill dip (which my children didn’t touch – hubbyman liked it though).

For the day two recipe, I used the left over tenders, topped them with marinara sauce and mozzarella and parmesan cheeses and had a terrific new taste sensation. Praise be to who ever first came up with that tasty combo.Best of all, chicken tenders prepared this way are ridiculously easy to prepare, full of flavor, and gluten free. My picky eaters club members snarfed them down and demanded more. They even choked down the lonely couple of green beans on their plates so they could present a clean platform for round 2.I’ll be trying out more ways to use the almond meal as a coating. YUM!

Saturday, April 3, 2010

Tofu for You-oo (aka Baked Tofu with Tamari Soy Sauce - Gluten Free)

Can anyone come up with a word that rhymes with tofu? I’m drawing a big blank on this one, hence the “you-oo” in today’s title.

I love tofu. I know not everybody starts twirling cartwheels when it comes to consuming the bland white brick, but this recipe is really good. Really. Years ago, when I used to earn my keep in downtown Portland, my girlfriends and I would meet for lunch at the Georgian Room housed in the old Meier and Frank department store. This chandeliered establishment graced the upper floors of the eight story building, and was a hold out from when women used to meet for tea and cakes while sitting properly with straight backs and gracefully positioning their parallel ankles off to the side. When I ate there, they served a loyal clientele, many of whom came to feast on the 4” high beer rolls and the amazing salad bar which boasted all sorts of freshly prepared goodies. It was at that salad bar that I fell in love with tofu as they served a marinated tofu that I couldn’t get enough of.

Fast forward to today. Meier and Frank is long gone, yet another family business absorbed by Macy’s, and the Georgian Room is no more. Luckily, though, I can prepare tofu recipes at home, and this one’s a winner.

I first saw this on Kalyn’s website and was immediately smitten. She got the recipe out of Mark Bittman’s How To Cook Everything Vegetarian cookbook, which I immediately snagged from my local library.This is so ridiculously easy and inexpensive to prepare, and tastes terrific. I gave it a go today and loved every bite. The soy sauce, tamari in my case, gives it just the right amount of salty goodness. My littlest gal, who’s graduated to a pureed AND soft diet, tentatively tried a bite and proceeded to snarf down the extra bit I had planned to eat tomorrow. (You know ... cook once, eat twice. Seems like no matter how much I cook, there’s never any left. I guess that’s a good thing.) Anyway, it’s great, full of calcium, gluten free, and really hits the spot. We ate ours sans accompaniment, but it would be terrific on a salad or with rice or rice noodles. My tofu snarfing gal asked me to make it again tomorrow as part of a stir fry. Um, that’s a terrific idea. Except, um, she can’t chew yet. *sigh* Still, I repeat, that would be a great recipe.

Anyway, for you tofu-phobes, this is a great way to give it a try. I love it and can’t wait to try this again. Next time I think I’ll spice it up a bit with some chili oil. Mmm, mmm, good.

Here we go:

1 pkg FIRM tofu
Gluten Free Tamari Soy Sauce (or the regular stuff if you don’t worry about gluten)
Garnishes: Green onion or toasted sesame seeds

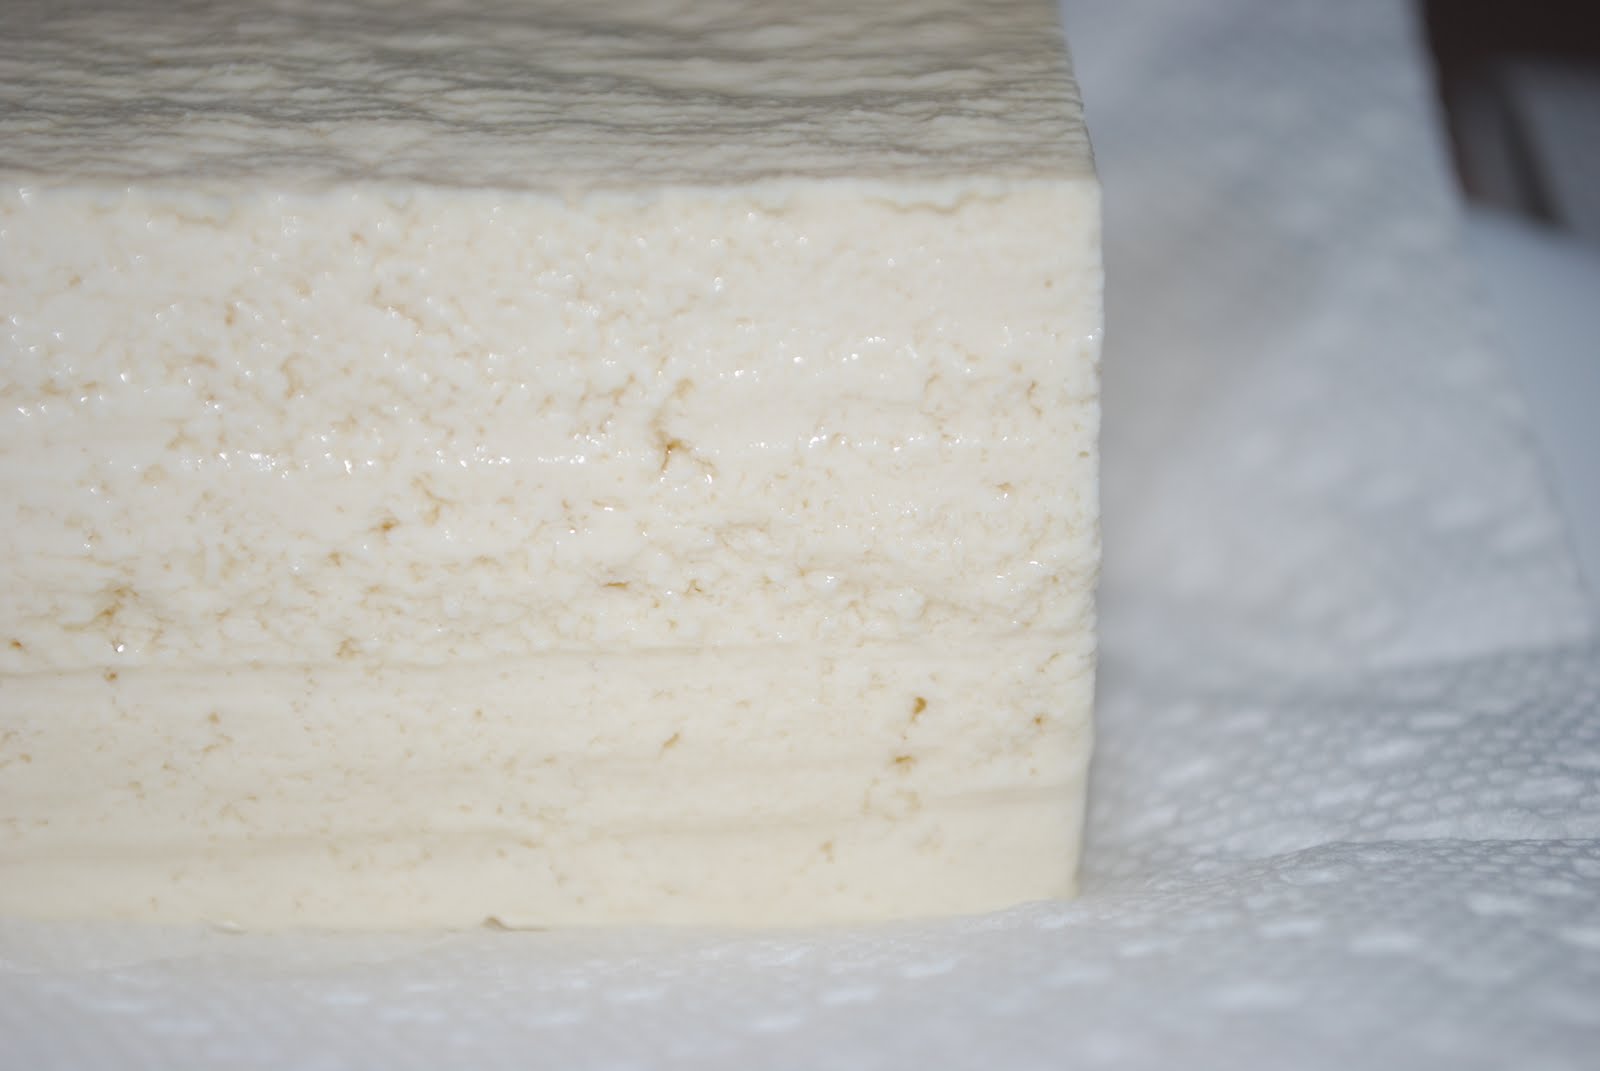
Preheat oven to 350. Drain, rinse, and drain again the tofu.Pat dry. (Boy, it’s hard to photograph white food!)I opted to cut the tofu brick in half horizontally. Um, I know this looks like a vertical cut, but I flipped it upright so I could slice it easier. You'll see what I mean in the next photo.Ta-da! Pat all the surfaces dry. Don’t go overboard drying it, just give it a good pat-down.Here’s what I use for soy sauce. It’s gluten free and called Tamari. LOVE it.Next, simply pour soy sauce over the tofu, coating all the surfaces. I didn’t measure but I’m guessing it was a couple tablespoons. I used a spoon to coat all surfaces, but a brush would work, too. Tofu acts like a sponge, and after a minute or two, it absorbed all the soy sauce. Place in a baking dish, do NOT cover, and bake for 1 hour. Serve immediately.See how it looks here? The texture firms up quite pleasantly while baking.
It’s kind of like a very firm egg custard. Those edges are amazing: crispy and a great contrast to the interior. Yum!See how firm it is on the fork? Don’t you just love that little green onion bit that is lassoed on one of the tines? I think this would taste great basted with other sauces, too, such as teriyaki. This is gluten free, too.

So, who’s game to give it a try?